Guide 03 · About 8 minutes
How to digitize vinyl on an iPhone
No Mac, no GarageBand, no transfer service. A USB cable from the turntable to the iPhone, one side of a record, and you have an album of tagged FLAC files in the Files app. Here is the whole job, from the cable to the folder.
What you need
- An iPhone running iOS 15 or later.
- A digital audio source over USB. One of: a turntable with a USB output, a USB phono preamp, a phono preamp into a USB audio interface, or a DJ mixer with USB audio and a phono input. It has to be class-compliant (USB Audio Class): if it works on a computer without installing a driver, it’s a good fit.
- The connection to the iPhone:
- An iPhone with USB-C (iPhone 15 and later) takes the device’s USB cable directly: USB-C to USB-C, or USB-B to USB-C for most turntables and preamps.
- An iPhone with Lightning needs Apple’s Lightning to USB 3 Camera Adapter, the one with a charging port. The device’s USB cable goes into the adapter.
- A recording app that reads USB audio. This guide uses StylusLog, which records, splits and tags. The setup and the advice apply to any USB recorder.
An iPhone can’t record a turntable cleanly through its microphone: you would be recording the room. And it has no line input. The audio has to arrive as a digital stream over USB, the same one a computer would get. Not sure which setup is yours? See USB turntable, phono preamp or mixer?
1. Connect the turntable
Plug the USB cable into the turntable (or the preamp, or the mixer) and into the iPhone or the adapter. If the device has its own power supply, switch it on first.
StylusLog shows the device as soon as iOS sees it, with the sample rate it records at. If nothing shows up:
- Try another cable. Some cables carry power only, not data.
- Give it power. An iPhone supplies little power over its port. A device powered by USB alone, like many small preamps and interfaces, may need more: plug the Lightning adapter’s charging port into a charger, or put a powered USB hub between the device and a USB-C iPhone.
Then pick the record. Search Discogs by artist and title, or paste a release link, and choose the pressing you have. The tracklist comes with it, side by side, with the track times. No Discogs account is needed. A white label or a test pressing that isn’t on Discogs can be recorded untagged and named later.
2. Why iOS asks for the microphone
The first time StylusLog connects, iOS asks whether it may use the microphone. Allow it. iOS treats every audio input as a microphone, including a USB turntable, so this is the permission that lets any app record from USB. StylusLog records only the USB device, never the iPhone’s own microphone.
If you tapped Don’t Allow, turn it on in Settings › StylusLog › Microphone.
3. Set the level
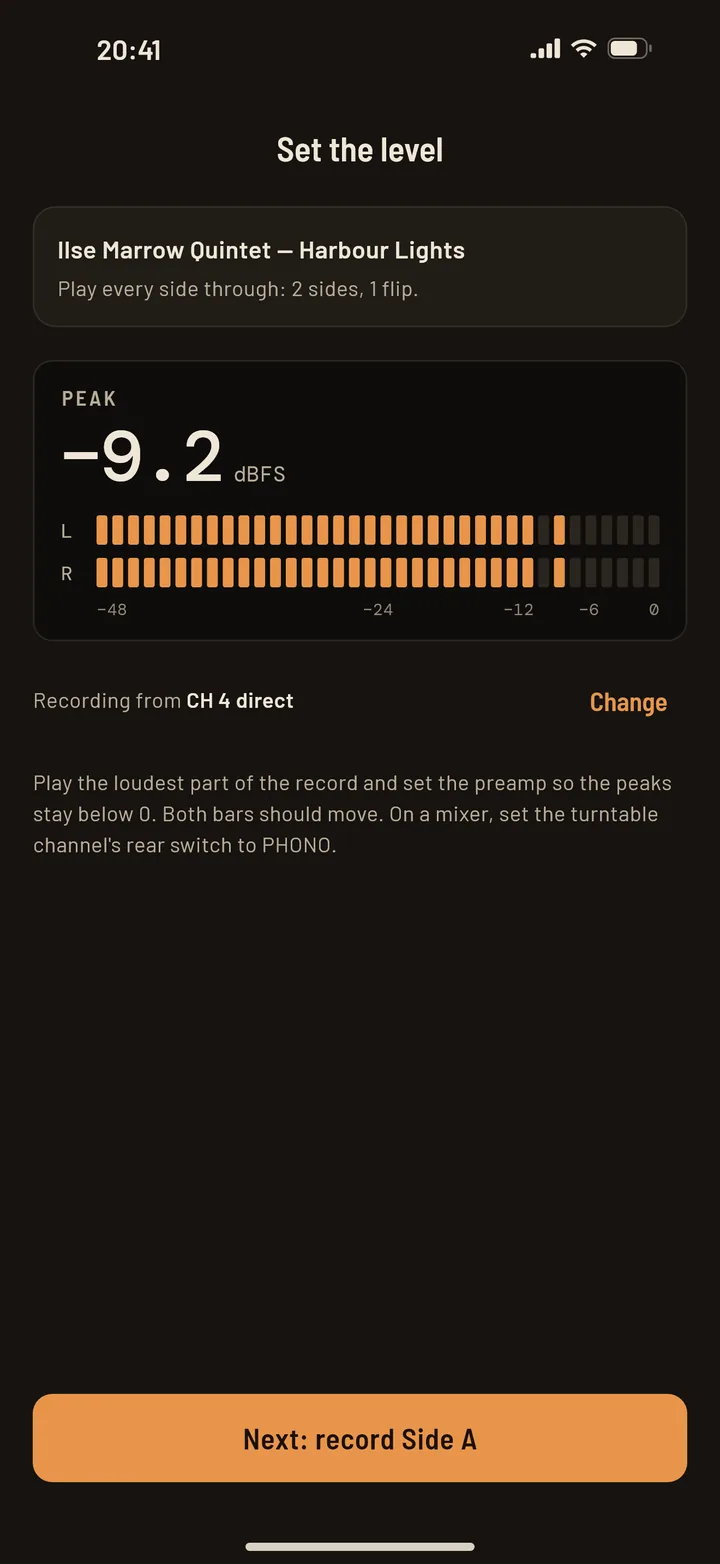
Drop the needle on the loudest part of the record and watch the meters. Aim for peaks around −6 dBFS, and never in the red. That leaves room for a louder moment you didn’t hear, without wasting resolution. The meter holds each peak for a second and a half so you can read it.
Turn the gain on the preamp or the turntable, not in the phone: the iPhone records what arrives. On a DJ mixer, the channel’s trim sets the level, and StylusLog follows the channel that’s playing.
Very quiet, and no bass? The turntable is going into a line input without a phono preamp. A turntable’s signal needs the preamp’s gain and its RIAA curve, which puts the bass back. Switch the turntable’s built-in preamp on, or use the PHONO input.
4. Record a side
Start recording, then drop the needle at the start of the side. You don’t need to be quick: StylusLog finds the needle drop from the audio and trims the silence before it.
At the end of the side, when the arm lifts or the runout groove starts, a short countdown stops the recording by itself. If it isn’t over, tap Keep recording. Then flip the record and record the next side the same way.
While it records, leave the turntable alone: a knock on the plinth is recorded too. And turn on Do Not Disturb or a Focus: a side runs about twenty minutes, and an answered call takes the audio input away from any app that is recording.
5. Split it into tracks
A side is one long recording. To get tracks, it has to be cut at the gaps between songs, and on vinyl those gaps aren’t silence: they are the quiet groove, with its surface noise.
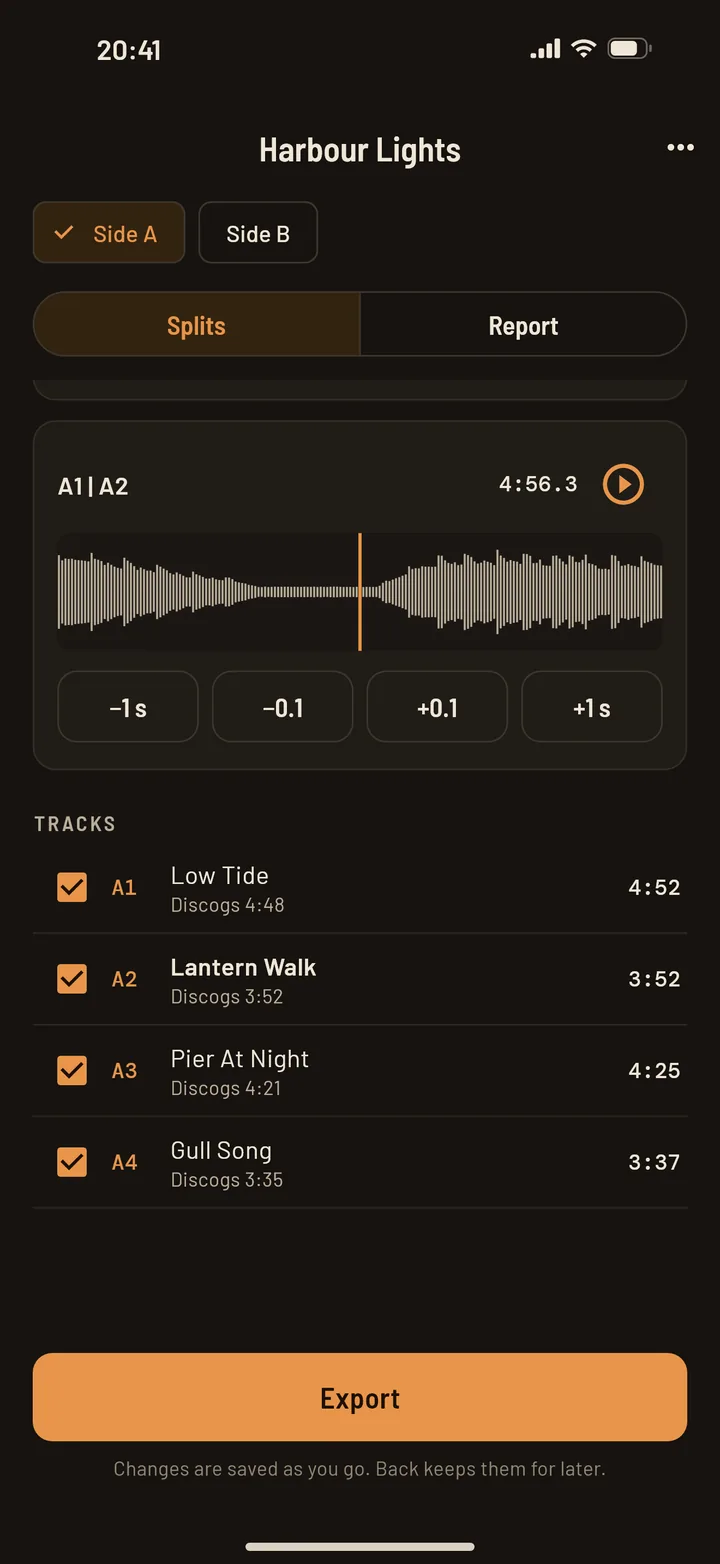
StylusLog measures each side’s own noise floor, finds where the music drops to it between tracks, and uses the Discogs track times as a guide to which gap is which. The times on Discogs are often rounded or missing, so the gaps in the audio lead.
Then check the cuts. Each one shows on a waveform; play across it, and nudge it by a tenth of a second or a second. A track that segues into the next has no gap, so add the split by hand there, or remove one that landed in a quiet passage. More on how it works, and on the records that need your ear: splitting a vinyl recording into tracks.
6. Check how it sounds
Before you export, read the side’s report. It measures what you might not hear on a first listen, and says what to do about each finding:
- Hum at 50 or 60 Hz usually means the turntable’s ground wire isn’t connected to the preamp’s ground terminal.
- Clipping means the level was too high: lower the gain and record the side again.
- One channel quieter by a dB or two points at the cartridge or its leads.
- Out of phase means a lead is swapped somewhere between the cartridge and the preamp.
- Clicks per minute and the surface noise give a suggested play grade. It comes from the sound alone, so it is a suggestion, not a grade.
Clicks can be repaired with declick, and hum and rumble filtered. Listen before and after; the raw recording stays as it was.
7. Export, and find the files
| Format | What it is | Use it for |
|---|---|---|
| FLAC | Lossless and compressed, with tags and the cover inside | Your archive, and any player that plays FLAC |
| WAV | Uncompressed, what was recorded | Editing software, DJ software, CD burning |
| M4A | AAC: lossy and small | Listening on the phone when space matters |
StylusLog writes an album folder you’ll find in the Files app under
On My iPhone › StylusLog › Artist - Album (Year), with files named by position and title, like
A1 Low Tide.flac. From there, share it to a Mac with AirDrop, copy it to iCloud Drive or a USB
drive, or open it in any player that reads from Files.
Keep the FLAC as your master: you can always make a smaller copy from it, never the other way round. Which bit depth and sample rate to keep: vinyl to FLAC, the settings that matter.
Tips for a cleaner transfer
- Clean the record and the stylus first. Every speck of dust becomes a click in the file.
- Connect the ground wire. Most hum is a loose or missing ground.
- Keep signal cables away from power leads, and the iPhone’s charger cable away from the turntable.
- Set the level once per record, on its loudest track, and leave it for every side.
- Record at the device’s own rate. Most USB turntables deliver 44.1 or 48 kHz; StylusLog records at the rate the device sends, and on iPhone saves it as 24-bit.
On an Android phone instead? See How to digitize vinyl on an Android phone.
Try it on your own records
StylusLog is free to try on your first three albums. Plug your gear in first: it shows whether it connects before you pay anything.